Blog · coaching centres
Set Up Your Coaching Centre Chatbot
Learn how to set up an AI chatbot for your coaching centre website. This step-by-step guide helps you answer student questions and manage inquiries.
By the Repli team · · 5 min read
Why a chatbot matters for coaching centres
Your coaching centre receives many questions every day. Students and parents want to know about course details, fees, batch timings, and demo classes. Answering these repeatedly takes time away from teaching and administration. If they cannot find answers quickly, they might look elsewhere.
A chatbot works 24/7. It gives instant answers to common questions using your own materials. This means fewer phone calls and emails for your team. It also helps capture leads even outside of your working hours. For questions that need a personal touch, the chatbot can collect contact details or alert your staff.
Setting up your coaching centre chatbot
Here are the steps to set up your Repli chatbot.
Step 1: Sign up for Repli.
When you sign up, choose "Coaching Centre" as your business type. This helps the chatbot understand your specific needs.
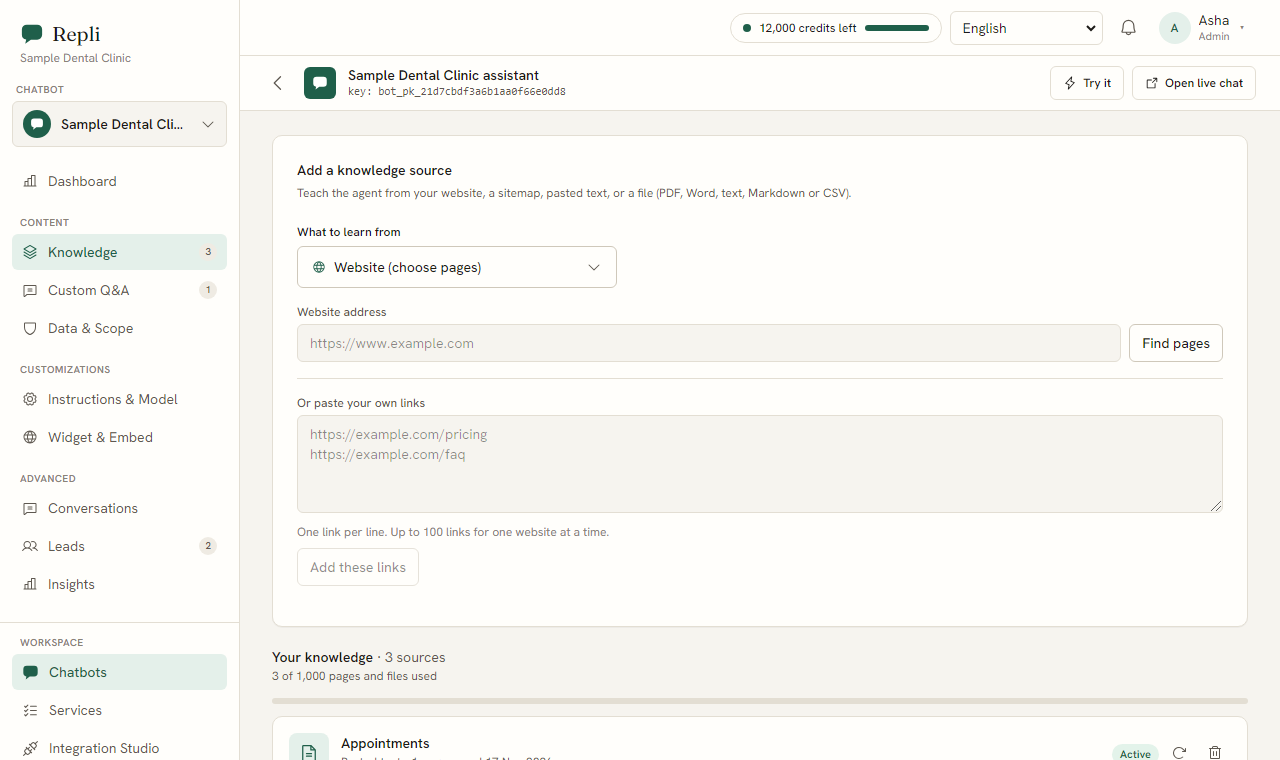
- Step 2: Give your chatbot knowledge. Go to the "Knowledge" section. This is where you teach your chatbot about your coaching centre.
- Add your website address or sitemap. The chatbot will read all the pages on your site.
- Upload important files. These could be your course brochure, detailed fee lists, batch schedules, scholarship rules, or admission policies. The chatbot learns from these documents.
- Add notes directly. If you have information not on your website or in files, you can type it in here. For example, specific details about your teaching methodology or student success stories.
Step 3: Add saved answers for common questions.
In the "Custom Q&A" section, you can create specific answers for questions you expect. For example, "What is the fee for the JEE Advanced course?" and you provide the exact fee structure. This ensures the chatbot gives precise answers to frequently asked questions.
- Step 4: Set the chatbot's tone and rules. Go to "Instructions and Model". Here you can tell the chatbot how to behave.
- You can set a friendly and encouraging tone suitable for students and parents.
- Add rules like "Do not give medical advice" if your courses touch on health topics, or "Do not promise specific exam results." For questions about professional advice (like career counselling that needs a human expert), instruct the chatbot to pass them to a person.
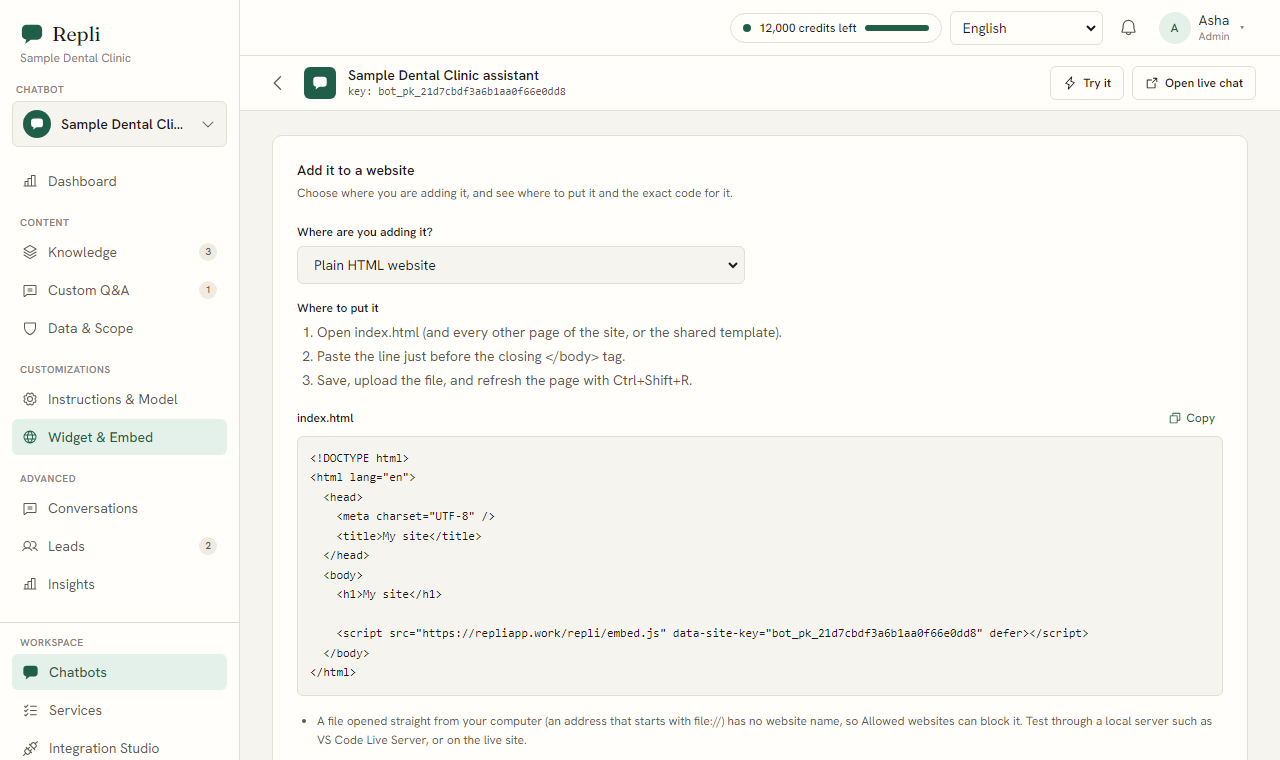
Step 5: Add the chatbot to your website.
In the "Widget and Embed" section, you will find a line of code. Copy this code. Paste it into your website's code, usually before the closing body tag. The chatbot will then appear in the corner of your website in your chosen colours.
Step 6: Collect lead information.
Under "Instructions and Model", you can enable the lead form. This allows the chatbot to ask for a visitor's name, email, and phone number when appropriate. For example, if a student asks for a demo class, the chatbot can offer to collect their details.
Step 7: Connect your team.
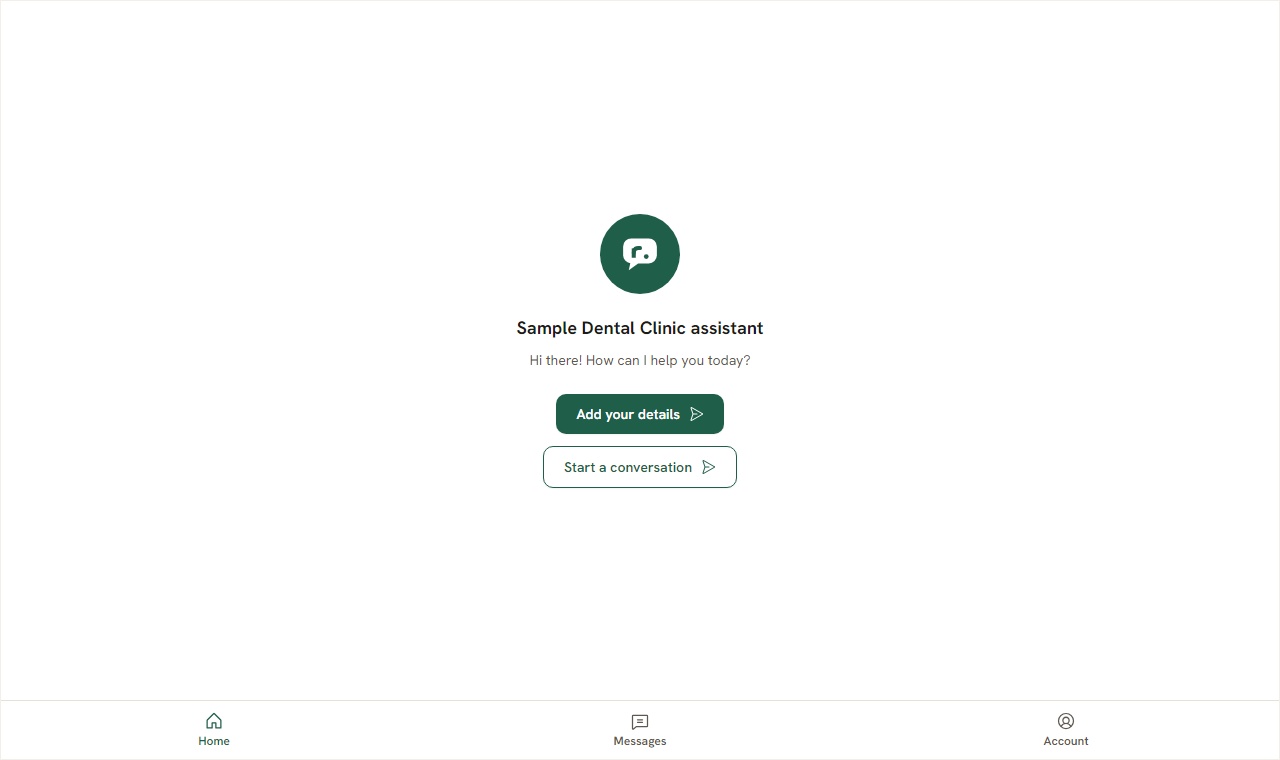
If a visitor asks to speak to a person, your team needs to be alerted. The chatbot can facilitate this. Your team can join the same chat conversation directly. The chatbot will then become quiet while your team member talks with the visitor.
Step 8: Offer booking links.
If you use Calendly for scheduling demo classes or counselling sessions, you can provide that link to the chatbot. It can then offer the link when a student asks to book a slot.
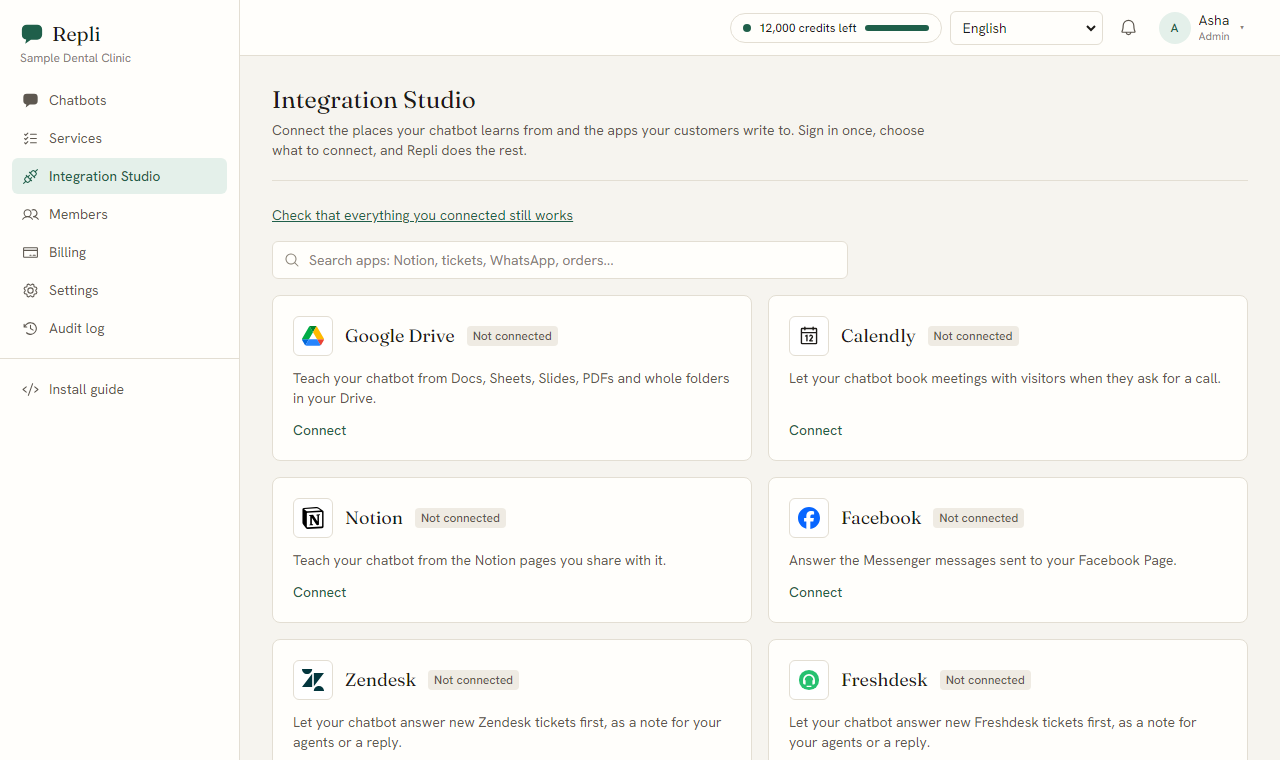
- Step 9: Integrate with other tools. In "Integration Studio", you can connect Repli with other services.
- If your course materials are in Google Drive or Notion, the chatbot can learn from them there.
- If you use Zendesk or Freshdesk for managing student inquiries, the chatbot can create tickets automatically.
Examples of chatbot interactions
Here are common questions from prospective students and parents, and how your chatbot should handle them using your provided information:
- Question: "Which batch is there in the evening for Class 10 Maths?"
- Chatbot's answer (from your batch schedule file): "For Class 10 Maths, we have an evening batch starting at 6:00 PM on Monday, Wednesday, and Friday. The instructor is Mr. Sharma. Would you like to know more about this batch?"
- Question: "What are the fees for the NEET preparation course?"
- Chatbot's answer (from your fee list document): "The fee for our NEET preparation course is ₹X per year, payable in quarterly installments. This includes study materials and mock tests. Are you interested in our scholarship program?"
- Question: "Can my child attend a demo class for the competitive exam coaching?"
- Chatbot's answer (from your admission policy or notes): "Yes, we offer a free demo class for all our competitive exam coaching programs. Please provide your name, email, and phone number, and our team will contact you to schedule it. Or, you can book directly using our Calendly link [link]."
- Question: "What are the eligibility criteria for your scholarship program?"
- Chatbot's answer (from your scholarship rules document): "Our scholarship program is open to students who scored above 90% in their previous board exams or performed exceptionally in our entrance test. You can find the full details and application form on our scholarships page [link]."
Common questions
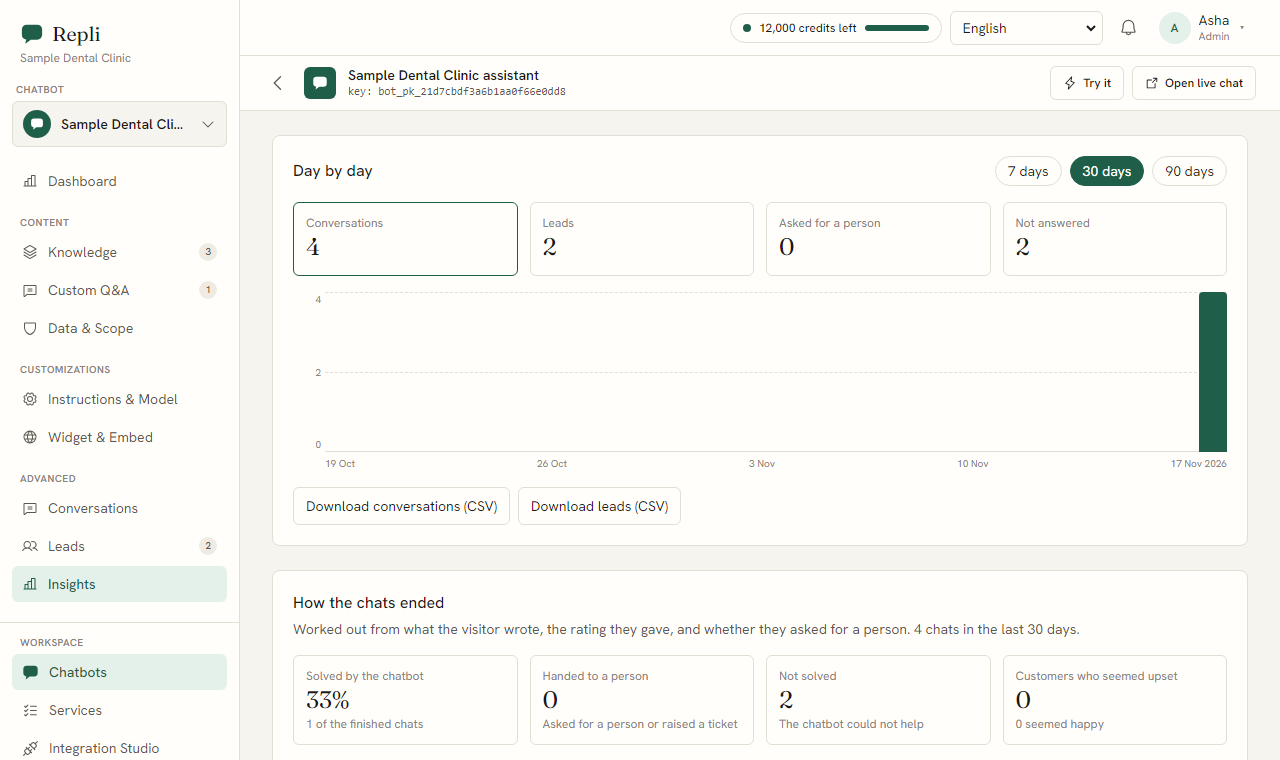
- How do I know what questions the chatbot could not answer?
- Go to the "Insights" section. It shows you questions the chatbot struggled with. You can then teach it the right answer with one click.
- Can the chatbot speak in different languages?
- Yes, the chatbot replies in the language the visitor writes in. This includes Hindi and Telugu, as far as the AI model supports it.
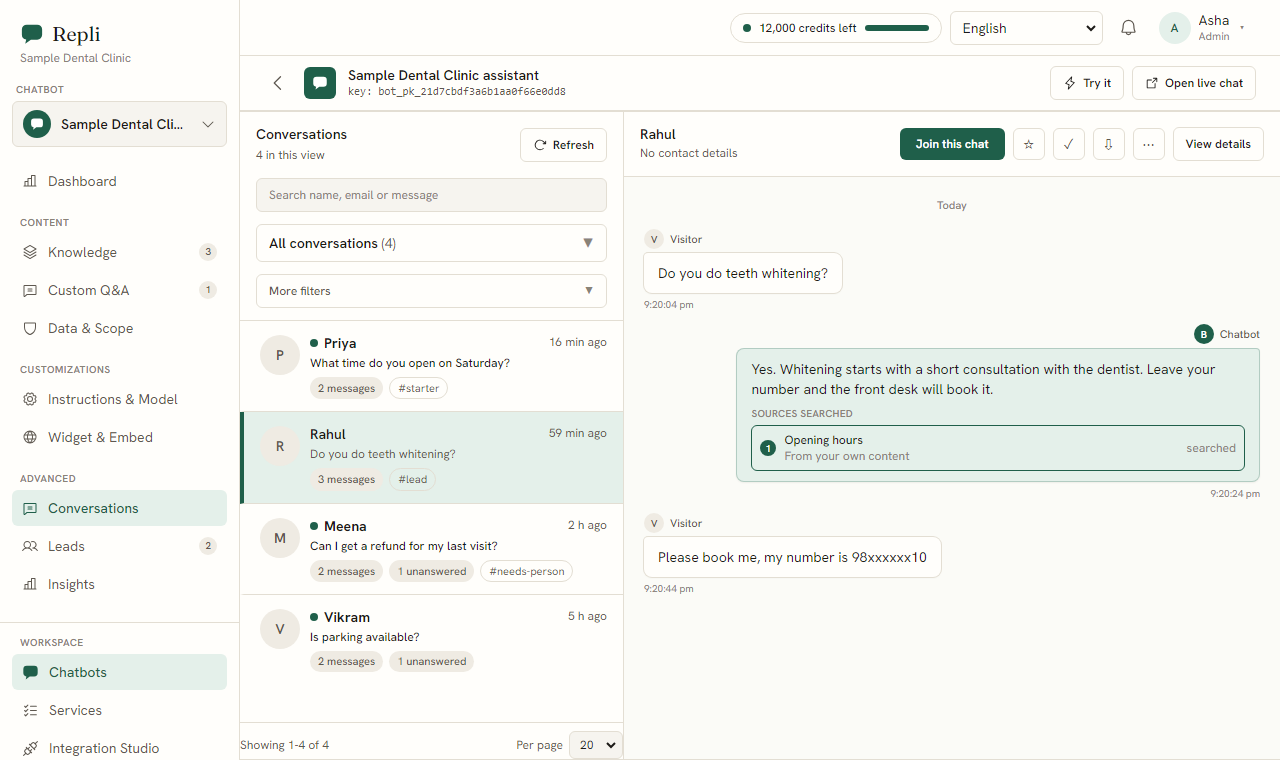
- How do I see the conversations the chatbot has had?
- In the "Conversations" section, you can read every chat the chatbot has had with visitors. This helps you understand what students are asking.
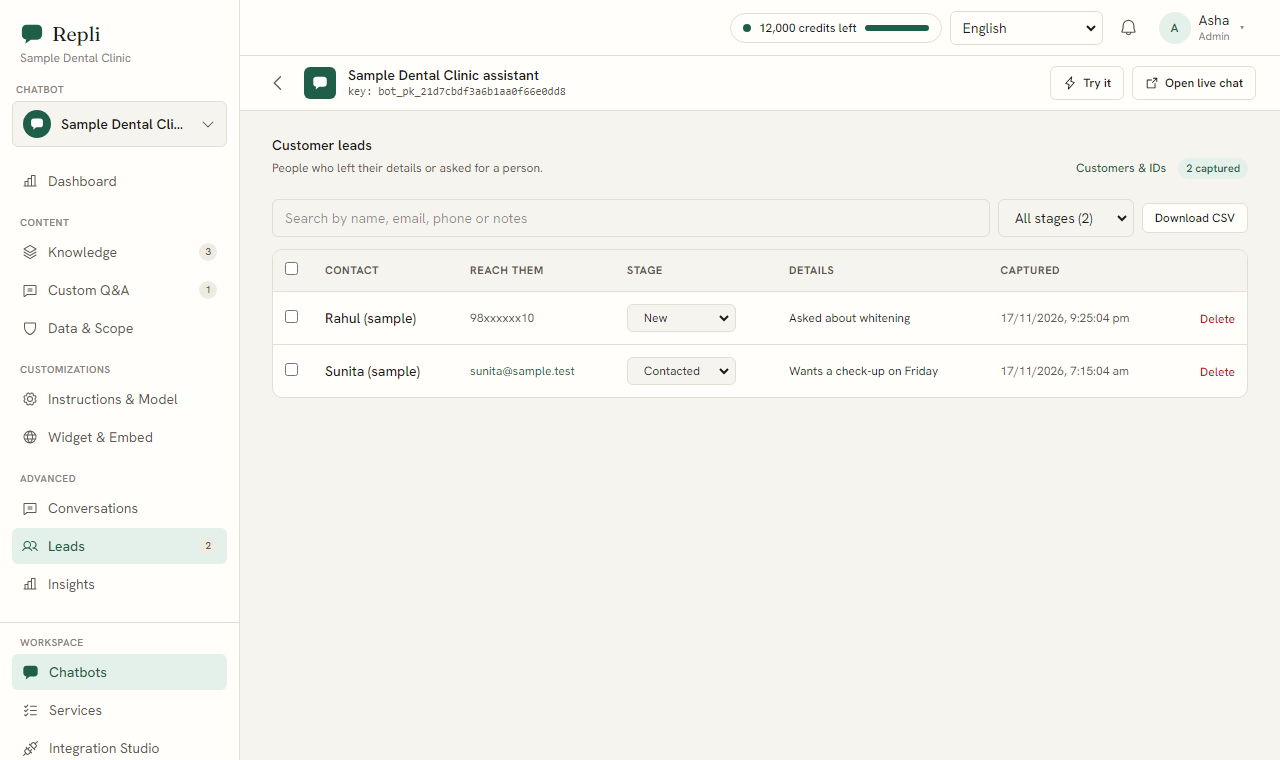
- Where can I see the leads collected by the chatbot?
- All the leads, including names, emails, and phone numbers, are listed in the "Leads" section for easy access.
What to do next
Setting up your chatbot is a continuous process. You will add more information as your coaching centre grows. Start by signing up for Repli and giving it your core information. Then, keep an eye on the "Insights" section to improve its answers over time. Try Repli on your own website.
See a chatbot trained on your own website
Paste your address and try it, with no sign-up.