Blog · clinics
Setting Up Your Clinic's Chatbot: A Practical Guide
Learn how to set up an AI chatbot for your clinic's website. This step-by-step guide covers everything from initial setup to answering patient questions.
By the Repli team · · 5 min read
Repli clinics
Setting Up Your Clinic's Chatbot: A Practical Guide
repliapp.work/blog
Getting Started with Your Clinic's Chatbot
Imagine a patient visiting your clinic's website. They have a simple question: "What are your Saturday hours?" Or, "Do you offer prenatal check-ups?" An AI chatbot can answer these questions instantly, any time of day. This guide shows you how to set up a chatbot for your clinic.
Repli is an AI chatbot for your website. It learns from your clinic's own information. It can answer patient questions and help them find what they need. If a question needs a human touch, it can alert your team.
Step 1: Sign Up and Initial Setup
The first step is to sign up for Repli. You will choose "clinic" as your business type. This helps the chatbot understand the kind of questions it might get.
Step 2: Teach Your Chatbot About Your Clinic
This is where you give the chatbot all your clinic's information. Think about the questions patients often ask.
Under the "Knowledge" section, you can add information in several ways:
- Website Address: Give it your clinic's website address or sitemap. The chatbot will read your service pages, doctor profiles, and general information.
- Upload Files: You can upload documents like:
- Your list of services and their descriptions.
- A fee schedule for consultations and common procedures.
- Doctor timetables and availability.
- Preparation instructions for tests (e.g., "Do I need to fast for this test?").
- Clinic policies regarding appointments or payments.
- Brochures about specific treatments.
- Add Notes: You can also type in specific notes. For example, "Our clinic is closed on public holidays."
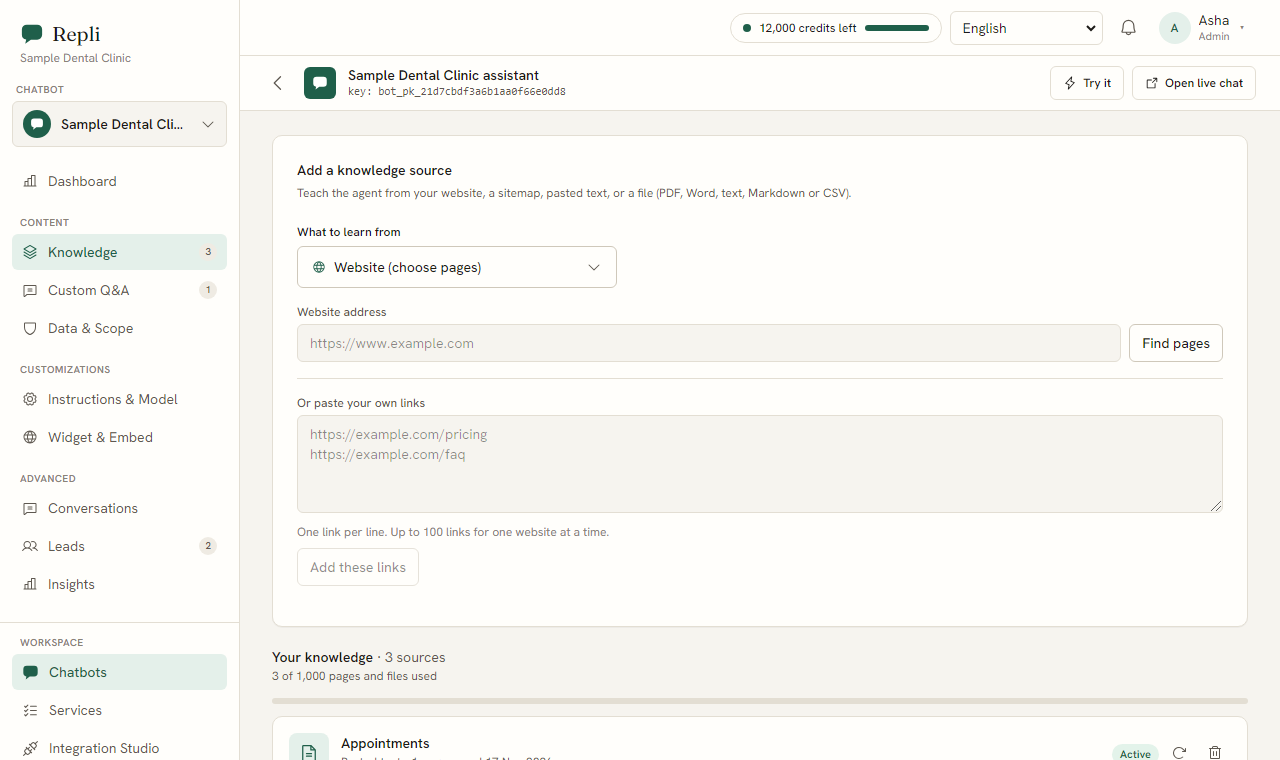
The more information you provide, the better your chatbot will be at answering. It will say when it does not know the answer.
Step 3: Add Saved Answers for Common Questions
Under "Custom Q&A," you can add specific answers for common questions. For example:
- Question: "Which doctor is in on Saturday?"
Answer: "Dr. Sharma is available for general consultations on Saturdays from 9 AM to 1 PM. Dr. Reddy specializes in pediatrics and is available from 10 AM to 2 PM."
- Question: "What is the consultation fee?"
Answer: "Our general consultation fee is [amount]. Specialist consultation fees may vary. Please refer to our detailed fee list for more information."
- Question: "Do I need to fast for this test?"
Answer: "For a fasting blood sugar test, you need to fast for 8-10 hours. For other tests, please check the specific instructions provided."
This ensures consistent and accurate answers for frequent inquiries.
Step 4: Set the Tone and Rules
Under "Instructions and Model," you set the chatbot's personality and rules. For a clinic, you might want a helpful, professional, and empathetic tone.
- Tone: You can instruct it to be "friendly and reassuring" or "professional and informative."
- Rules: Crucially, for a clinic, you must add a rule that the chatbot does not give medical advice. For example: "If a visitor asks for medical advice, tell them to consult a doctor directly. Do not provide diagnoses or treatment recommendations. Offer to connect them to a team member." This is very important for patient safety and compliance.
Step 5: Add the Chatbot to Your Website
Now it is time to put the chatbot on your clinic's website. Under "Widget and Embed," you will find a single line of code. This is a script tag. Copy this code. Then, paste it into your website's code. This is usually done in the footer or header section of your website.
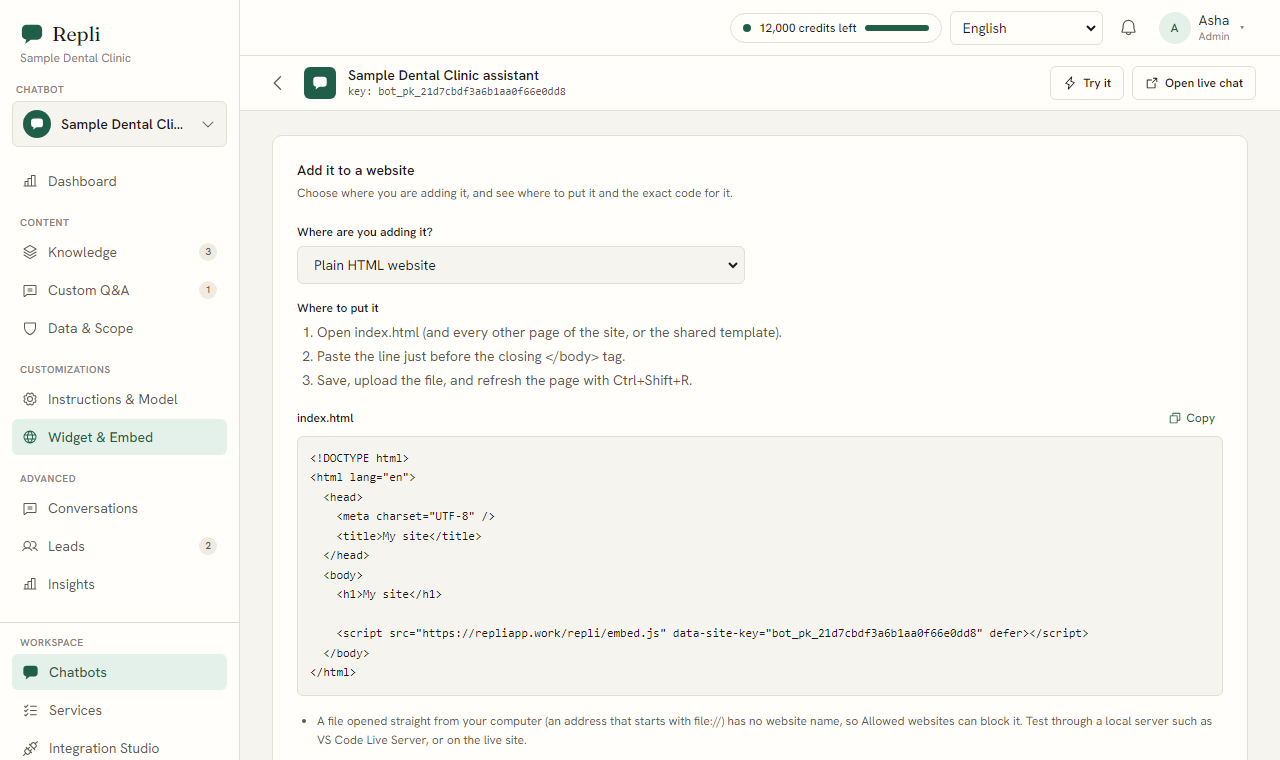
Once you save your website changes, the chatbot will appear in the corner of your clinic's website. You can also customize its colours to match your clinic's branding.
Step 6: Handling Patient Inquiries and Leads
Your chatbot is now live and ready to help patients.
- Lead Collection: The chatbot can collect patient details like name, email, and phone number through a lead form. This is useful for appointment requests or follow-ups.
- Connecting to Your Team: If a patient asks to speak to a person, your team will be alerted. A team member can then join the same chat. The chatbot will stay quiet while your team talks to the patient. This ensures a smooth handover.
- Booking Appointments: You can offer a Calendly link through the chatbot for patients to book appointments directly.
- Language Support: The chatbot replies in the language the visitor writes in. This includes Hindi and Telugu, as far as the AI model supports it.
Step 7: Reviewing and Improving Your Chatbot
This is an ongoing process to make your chatbot even better.
- Conversations: Under "Conversations," you can read every chat the chatbot has had. This helps you understand what patients are asking and how the chatbot responded.
- Leads: Under "Leads," you will see all the contact information collected from patients.
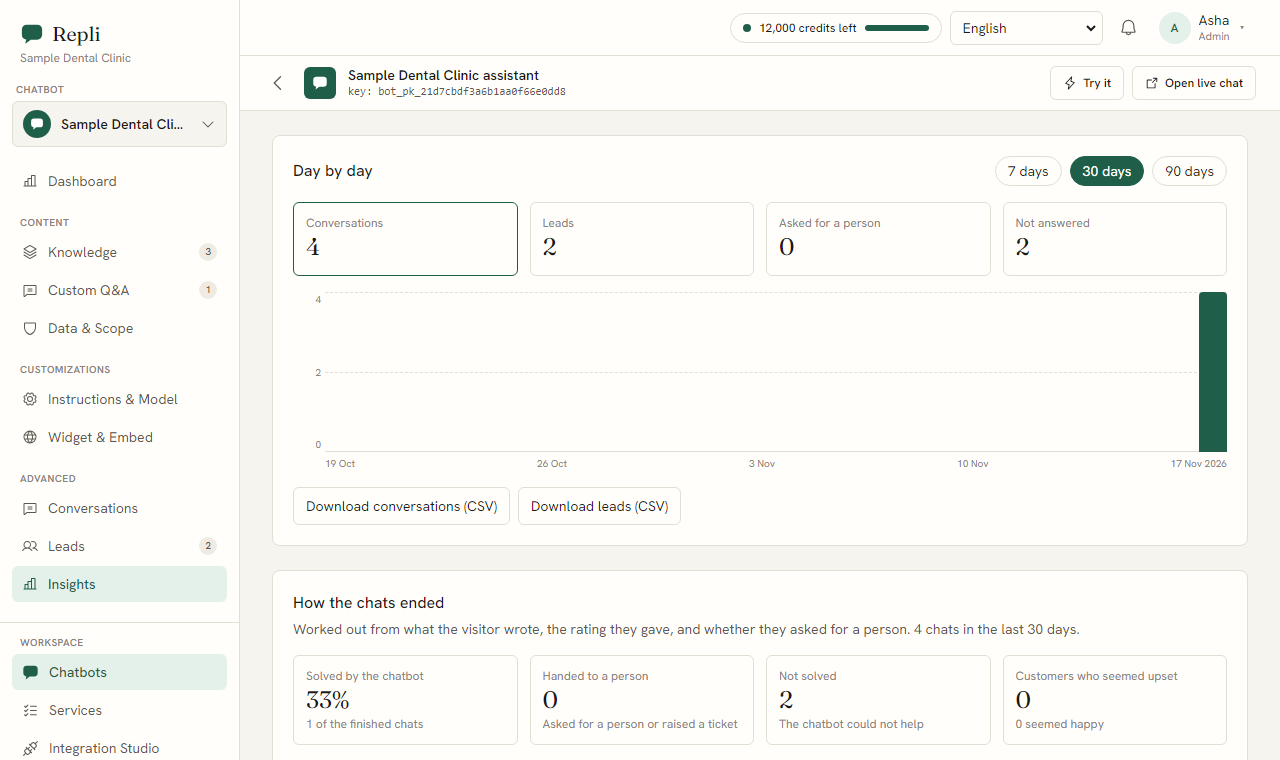
- Insights: The "Insights" section shows you questions the chatbot could not answer. This is very valuable. With one click, you can teach it the correct answer. For example, if it did not know about a new service, you can add that information here.
What to do next
Setting up a chatbot for your clinic can free up your staff to focus on patient care. It provides instant answers for patients. Start by signing up for Repli and begin teaching it about your clinic today.
See a chatbot trained on your own website
Paste your address and try it, with no sign-up.