Blog · car and bike service centres
Setting Up Your Service Centre Chatbot
Learn how to set up a chatbot for your car or bike service centre. This guide covers everything from adding your prices to answering customer questions.
By the Repli team · · 4 min read
Repli car and bike service centres
Setting Up Your Service Centre Chatbot
repliapp.work/blog
Start with a Sign Up
The first step is to sign up for Repli. You will choose "Automotive Service Centre" as your business type. This helps the chatbot understand your kind of business from the start.
Teach Your Chatbot About Your Business
Your chatbot needs to learn about your service centre. Think of it as a new employee. It needs to know all the answers your customers usually ask.
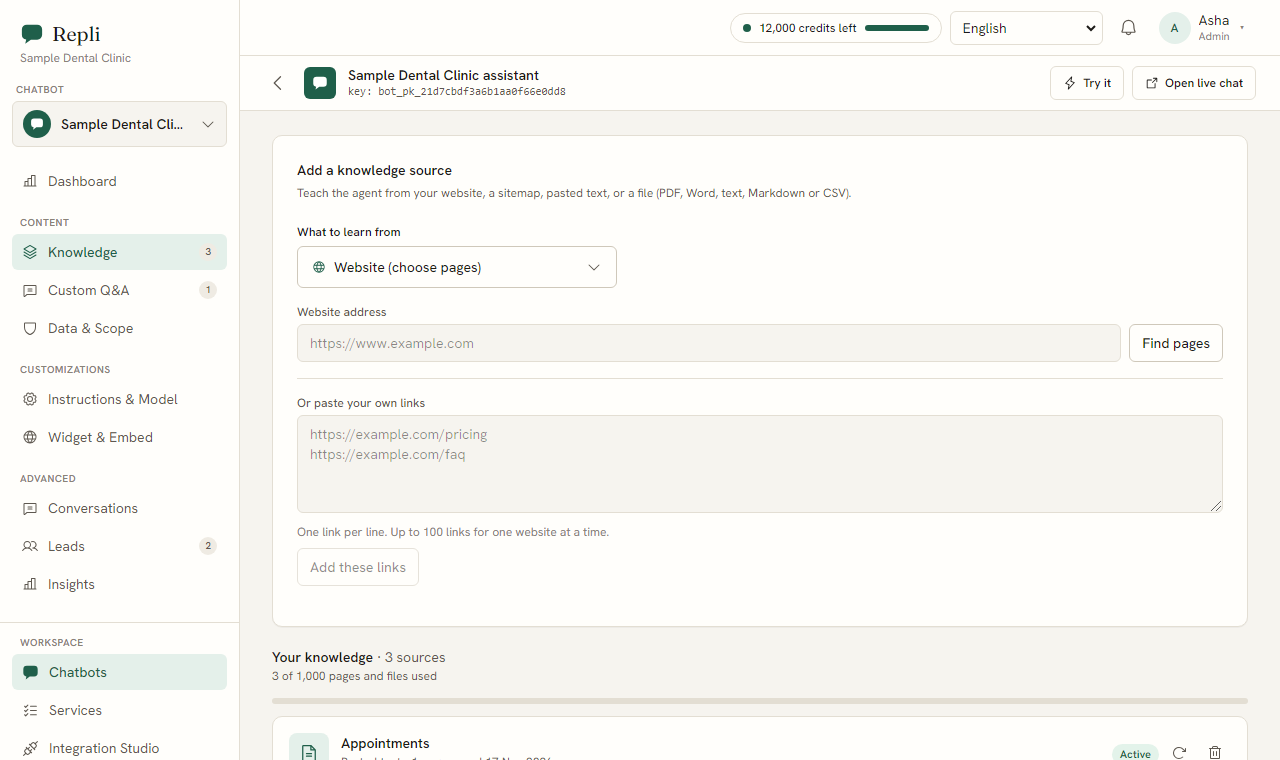
- Website and Sitemaps: Give the chatbot your website address. It will read your service pages, contact details, and other information. If you have a sitemap, add that too. This helps it find all your pages quickly.
- Upload Your Files: This is where you add your important documents.
- Service Price List: Upload your detailed price list for different car and bike models. Customers often ask, "How much is a general service for my car?" or "What is the cost for an oil change on my scooter?"
- Pick-up and Drop Policy: If you offer vehicle pick-up and drop-off, upload this policy. Explain areas you cover and any charges. Customers will ask, "Can you pick up my vehicle?"
- Insurers You Work With: List the insurance companies you are partnered with. Customers frequently ask, "Do you work with XYZ Insurance?"
- Service Packages and Details: Upload brochures or documents detailing your service packages. This includes what each package covers and its benefits.
- Warranty Information: If you offer a warranty on parts or services, upload this document.
- FAQs: If you have an existing list of frequently asked questions, upload it.
- Add Notes: For information not on your website or in files, you can type it in directly.
- Common Questions: Think about questions that come up often. For example, "What payment methods do you accept?" or "What are your opening hours on holidays?"
- Special Offers: If you have current promotions, add details here.
- Team Contact: How can a customer reach a person if needed?
Customise Common Answers
Under "Custom Q&A," you can set specific answers for very common questions. This ensures the chatbot gives the exact answer you want.
- For "What are your operating hours?", you can set the exact times.
- For "How do I book a service?", you can provide a direct link to your booking page or a Calendly link.
Set the Chatbot's Personality and Rules
Go to "Instructions and Model" to define how your chatbot should behave.
- Tone: Should it be friendly, professional, or direct? For a service centre, a helpful and professional tone is usually best.
- Rules: Tell it to always refer to your uploaded documents for prices. You can also tell it to offer to connect a customer with a person for complex issues.
- Professional Advice: Important for service centres: Tell the chatbot it does not give professional advice on repairs or technical issues. It should always pass these questions to a person. For example, if a customer asks, "My car is making a strange noise, what should I do?", the chatbot should suggest talking to a mechanic directly.
Put the Chatbot on Your Website
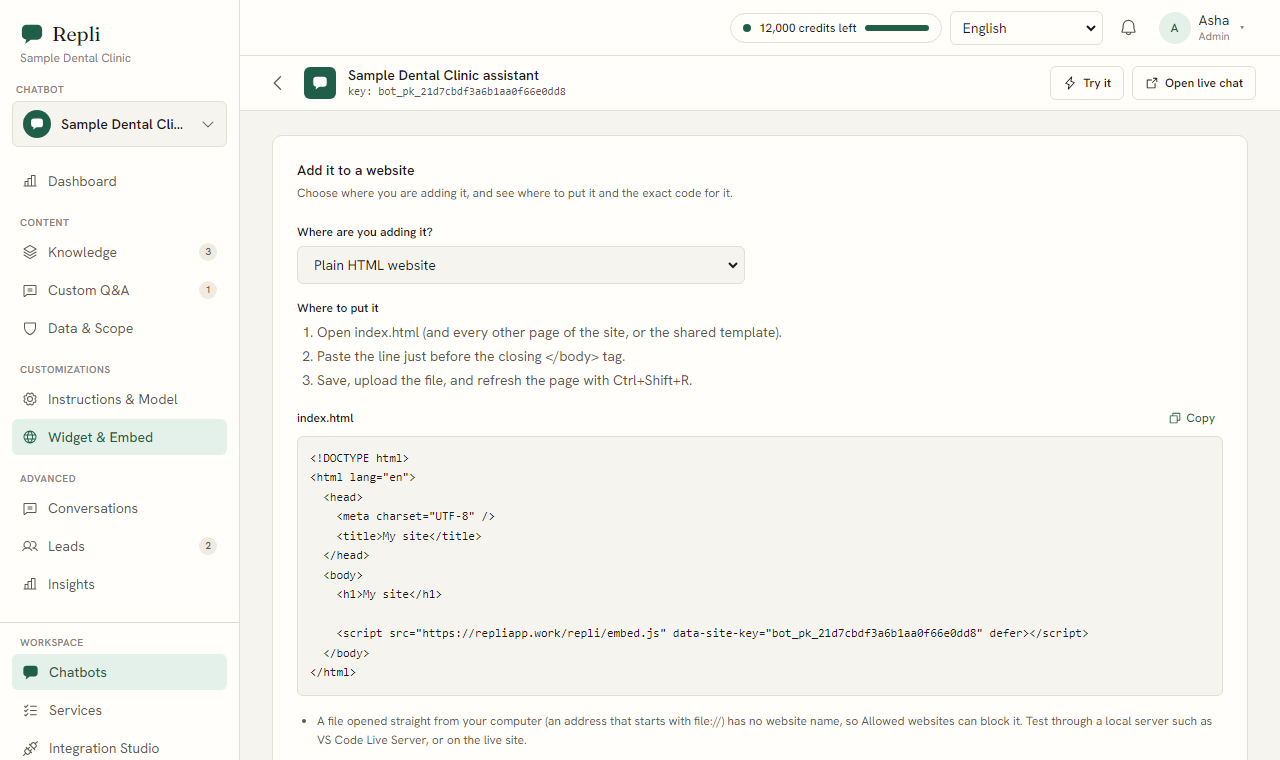
Under "Widget and Embed," you will find a single line of code. Copy this code. Paste it into your website's code, usually before the `</body>` tag. The chatbot will then appear on your website in the corner. You can choose the colours to match your brand.
Test Your Chatbot
Before customers start using it, test it yourself. Ask it questions your customers would ask:
- "How much is a general service for my Royal Enfield?"
- "Do you service electric cars?"
- "Can I pay with UPI?"
- "When is my vehicle ready?" (It will likely say it does not know this specific customer information, and offer to connect them to a person. This is correct.)
Make sure it gives helpful answers based on the information you provided.
Manage Conversations and Learn
- Conversations: Under "Conversations," you can read every chat the chatbot has had. This helps you see how it is performing.
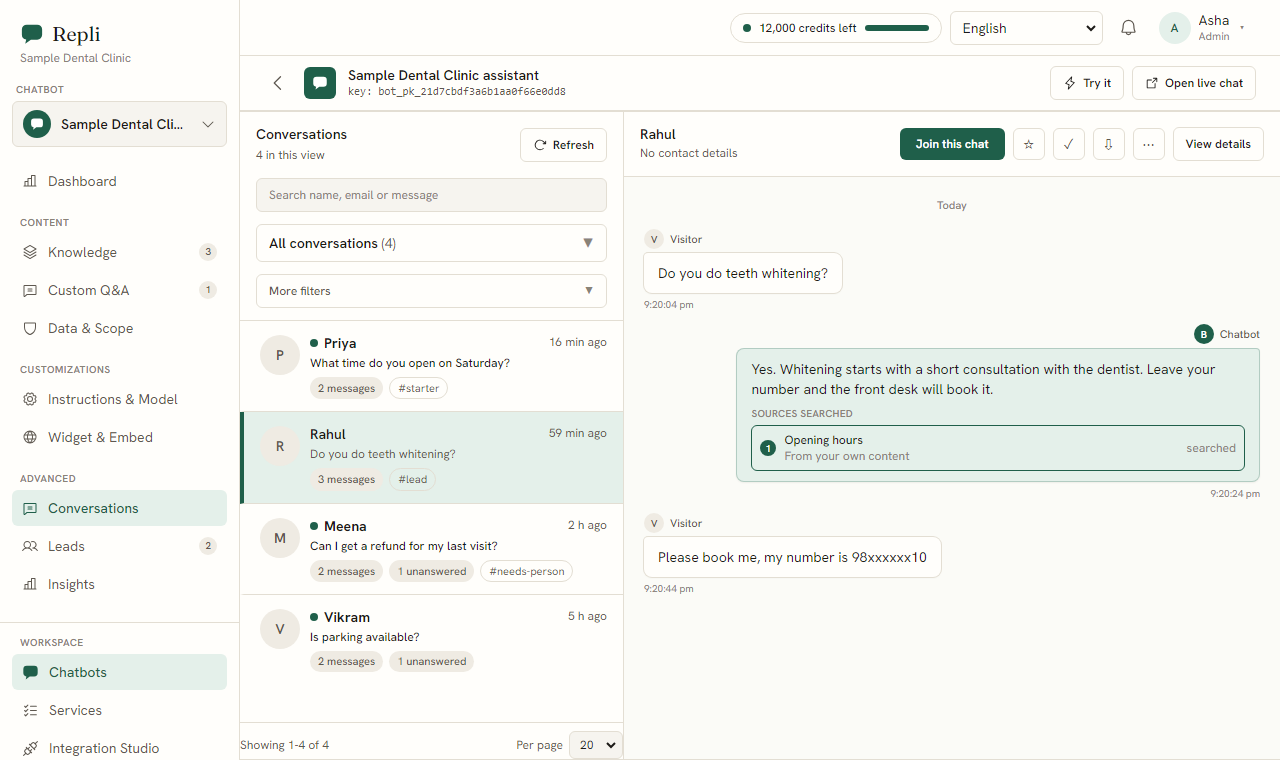
- Leads: If you set up a lead form (for name, email, phone), you will see these details under "Leads."
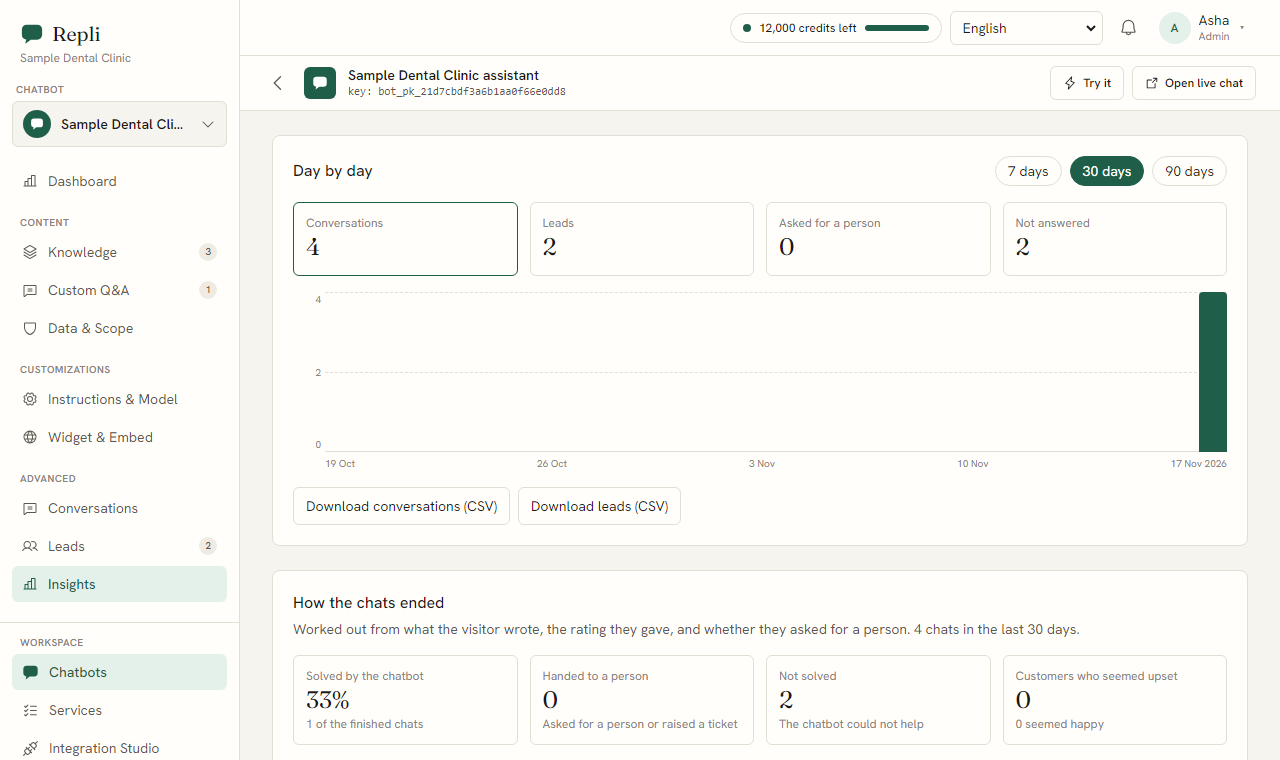
- Insights: This is a very useful section. Under "Insights," you will see questions the chatbot could not answer. With one click, you can teach it the correct answer. For example, if many customers ask about a new service you offer, and the chatbot did not know, you can teach it there.
Connect to Other Tools
- Bookings: You can set up the chatbot to offer a Calendly link for service bookings.
- Integration Studio: Connect Google Drive or Notion if you store service manuals or internal guides there. For customer tickets, you can connect Zendesk or Freshdesk.
What to do next
Sign up for Repli and start teaching your chatbot about your service centre today. See how it can help your customers.
See a chatbot trained on your own website
Paste your address and try it, with no sign-up.